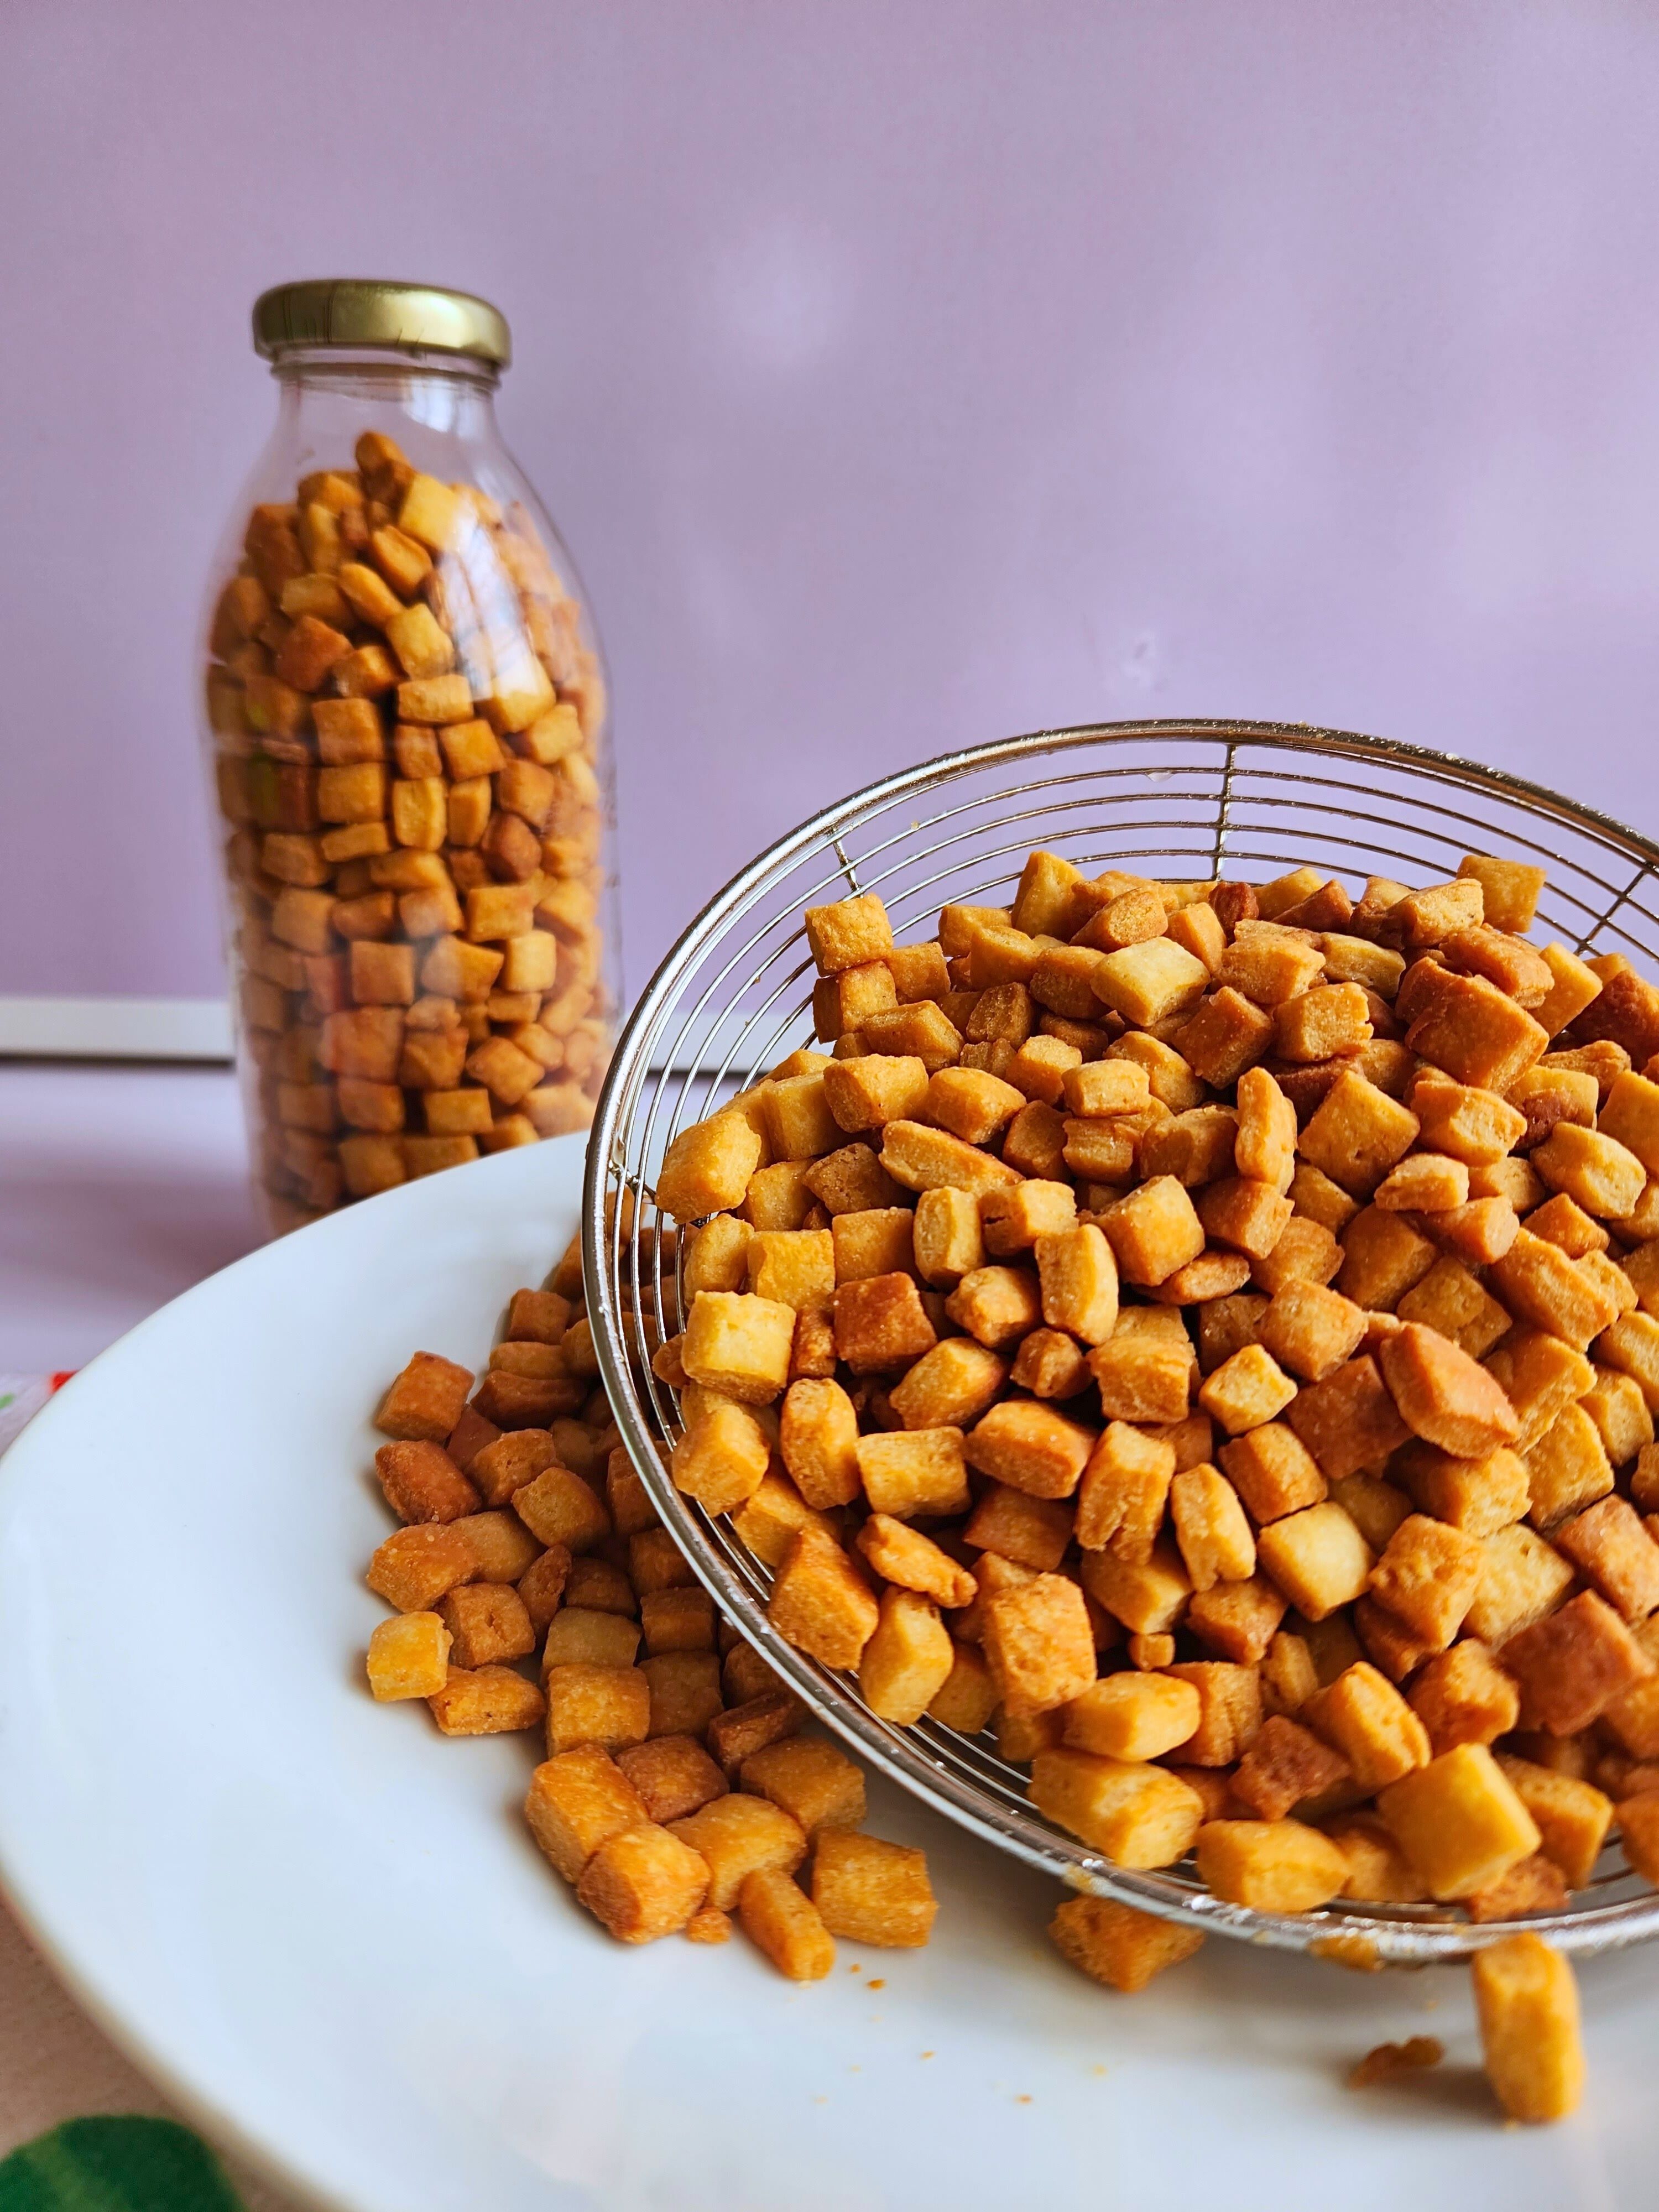
Chin-chin
If there’s one snack that should never be absent in any home, it’s chin-chin. This classic Nigerian treat always makes my Christmas snack list, and it’s usually the first thing we offer visitors – something to munch on while they wait for the main dish to arrive.
I absolutely love making chin-chin at home because store-bought versions can never compare to the rich, milky taste of homemade chin-chin. In my house, it’s a must-have. My kids enjoy snacking on it while watching their favorite cartoons, just like they do with popcorn.
Chin-chin is crispy, crunchy, and completely mouthwatering. It’s loved by everyone, and once you take the first bite, you’ll find yourself reaching for more as it can be quite addictive! That’s exactly why it deserves a permanent spot in every home.
In this post, I’ll walk you through the exact steps I use to make the most palatable and appetizing chin-chin right from the comfort of my kitchen. I’ll also share my secret for achieving that perfect crunch without making it too hard, plus tips to help your chin-chin last longer without going bad.
So, please stick around, you’re going to love this one.
Chin-chin Ingredients
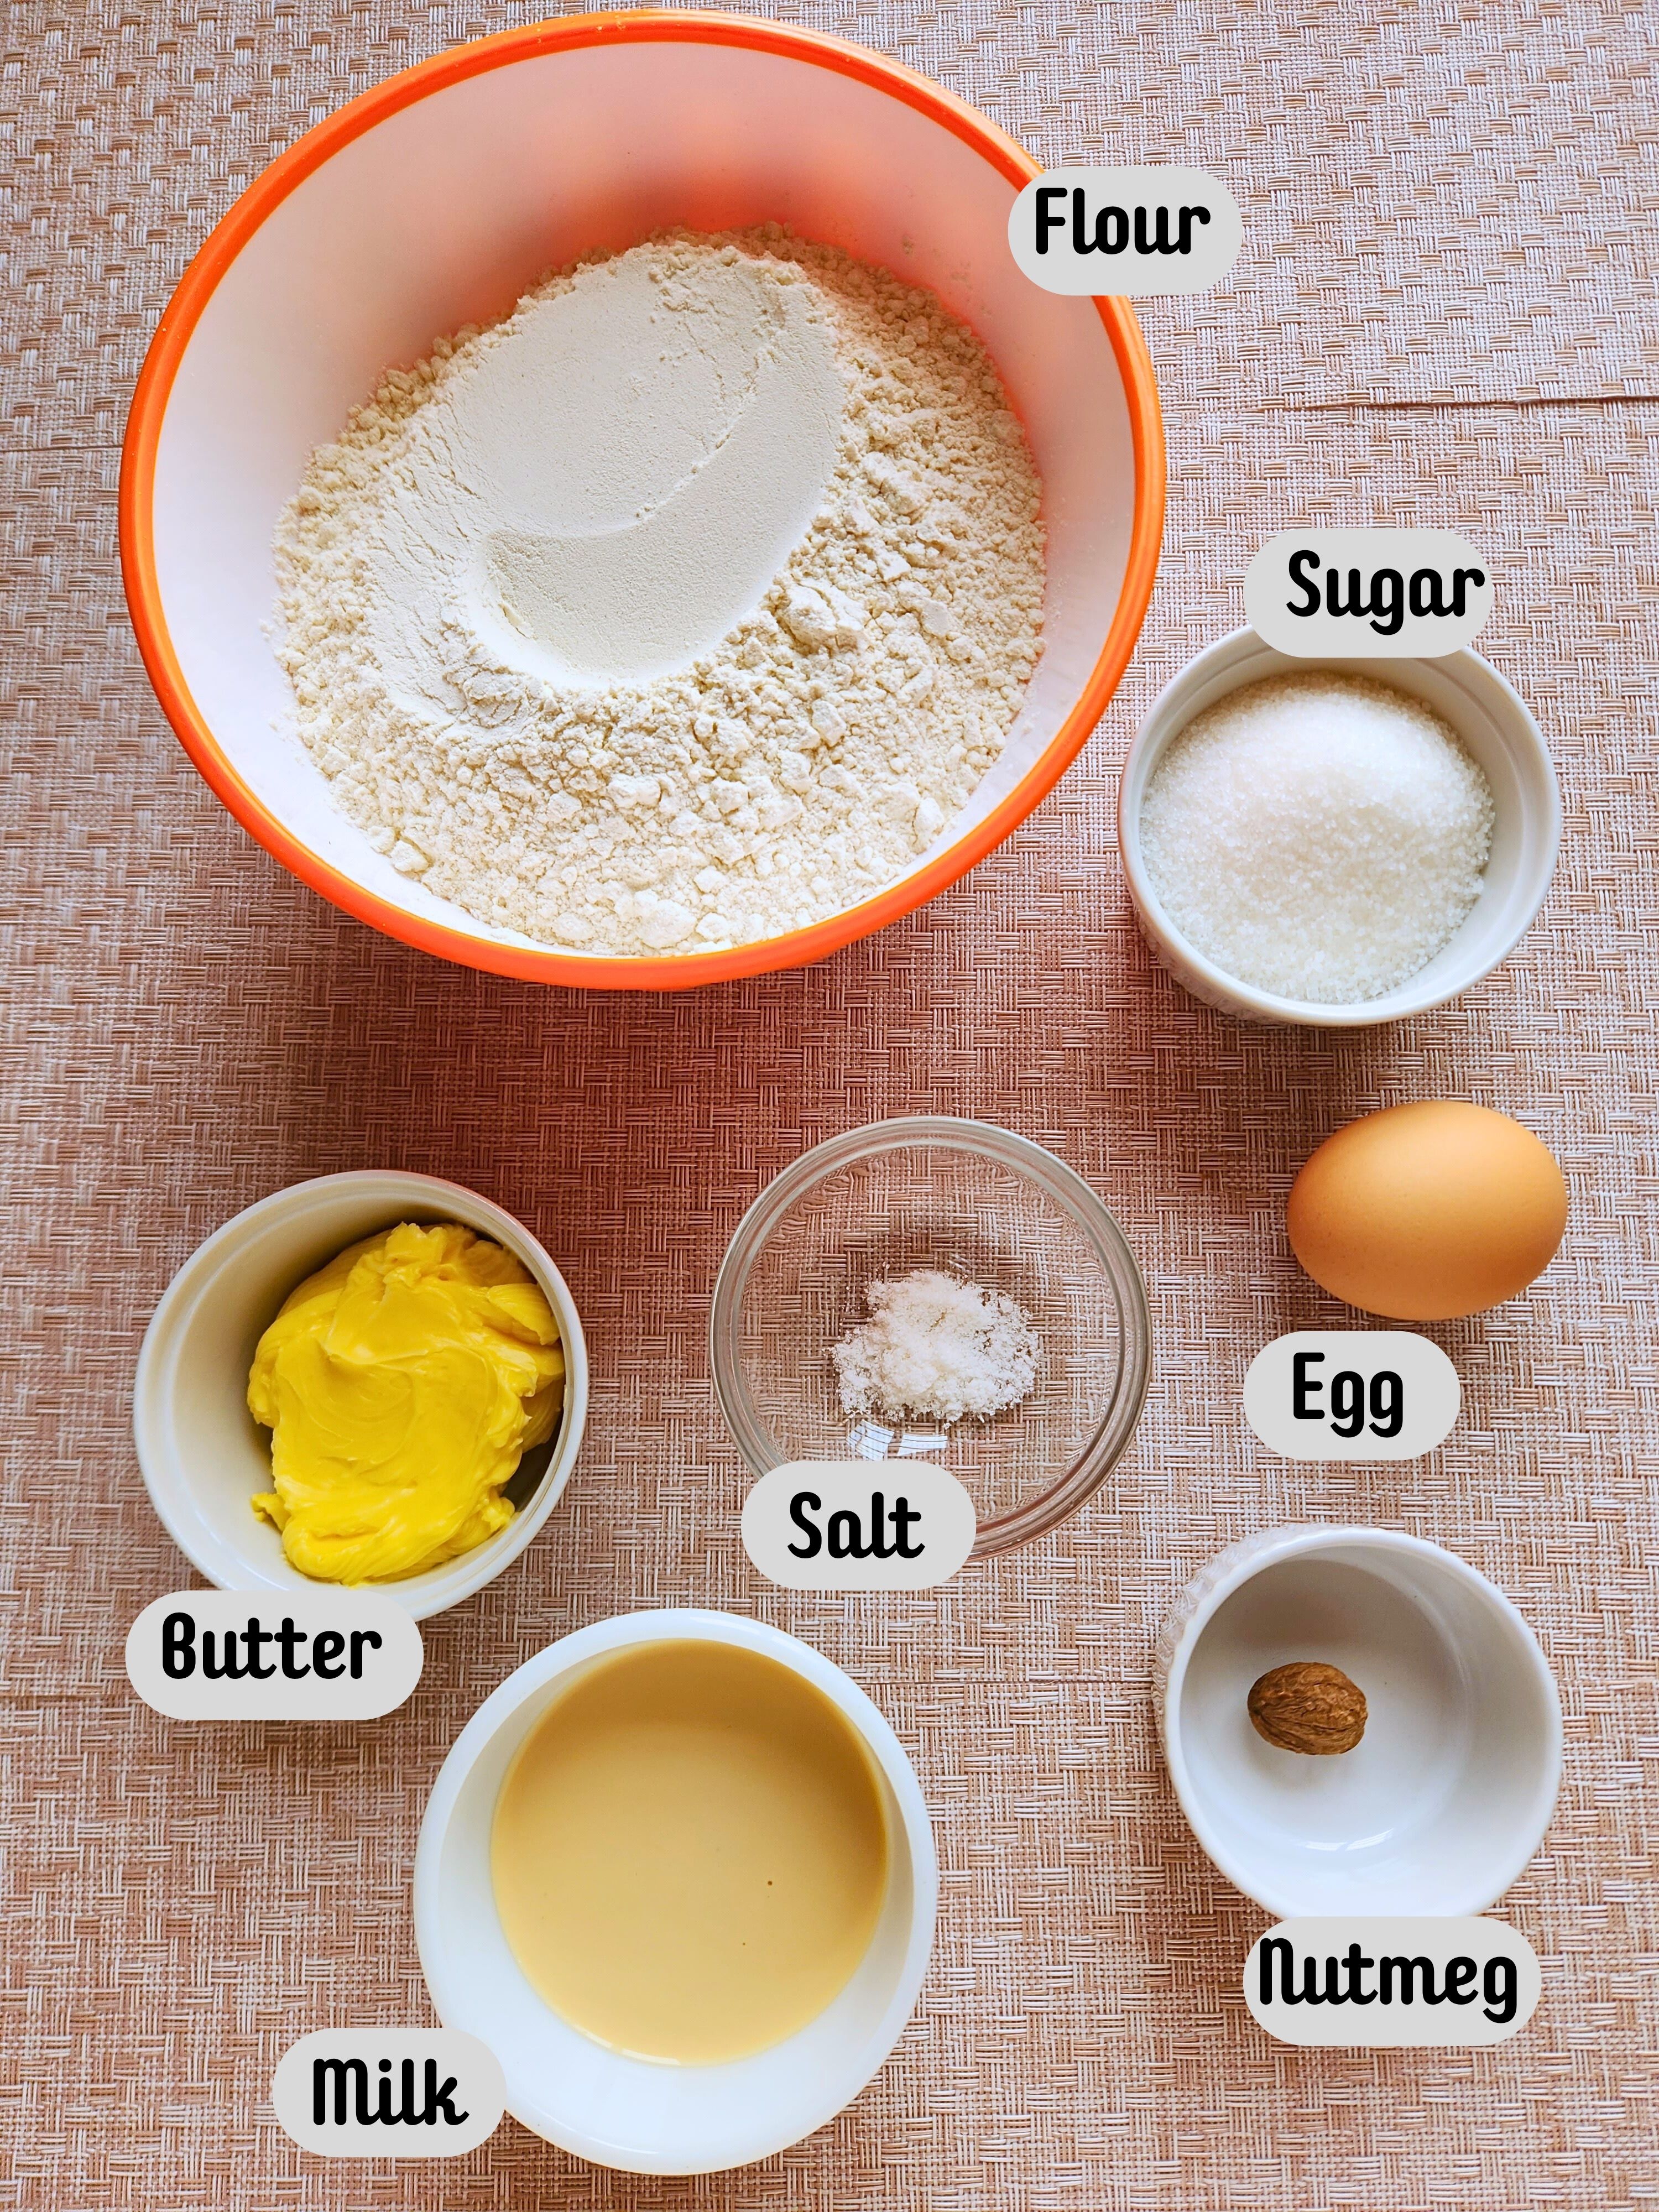
- Flour: Chin-chin needs all-purpose flour, and honestly, it gives the best results. It creates that perfect balance between that crunch and bite we are aiming for. Using other types of flour can change both the taste and texture of your chin-chin. For instance, confectionery flour may make it too soft and crumbly, while bread flour can make it overly dense and tough. If you want that classic, satisfying crunch, all-purpose flour is your best bet trust me.
- Sugar: Sincerely, you really do not need too much sugar to get the best results. Chin-chin isn’t meant to be overly sweet; just enough sugar brings out the flavor and gives it that addictive taste that keeps you reaching for more.
- Butter: I use softened unsalted butter for this recipe because it allows me to control the salt level and gives the chin-chin a rich, buttery taste. If you don’t have unsalted butter, salted butter or margarine will work just fine. Just remember to reduce or completely skip the added salt so the chin-chin doesn’t turn out too salty.
- Egg: This is one of my secret ingredients for getting perfectly crunchy chin-chin. Adding an egg to the dough helps bind everything together and gives the chin-chin a firm, crisp texture once fried – never soggy and never too hard.
- Milk: I usually use evaporated milk because it adds richness and depth to the flavor. It gives the chin-chin that creamy, homemade taste that store-bought versions lack. You can substitute with whole milk or full-cream milk, and if you prefer to skip milk entirely, water works too. Just know the flavor won’t be as rich.
- Nutmeg: Nutmeg adds that unmistakable, warm aroma and flavor that makes chin-chin extra special. I absolutely love how it transforms the snack. If you don’t have nutmeg or you’re not a fan, you can substitute it with cinnamon or any other spice you enjoy, or simply leave it out altogether.
How to make Chin-chin step by step
Making chin-chin at home is quite simple once you understand the process. Follow these steps carefully, and you’ll end up with chin-chin that is crunchy, flavorful, and absolutely irresistible.
Step 1: Prepare the liquid mixture
Begin by cracking the egg into a small bowl and whisking it together with the milk until well combined. If you’re using powdered milk, dissolve a few tablespoons in water to achieve a similar consistency to evaporated milk. Set this mixture aside for later use. It helps bring moisture, richness, and structure to the dough.
Step 2: Combine the dry ingredients
In a large mixing bowl, add the flour, sugar, salt, and nutmeg. Mix everything thoroughly so the ingredients are evenly distributed. This step is important because it ensures that every bite of chin-chin has balanced sweetness and flavor.

Step 3: Work in the butter
Add the softened butter or margarine to the dry mixture. Using your fingertips, gently rub the butter into the flour until the mixture looks crumbly, similar to breadcrumbs. This process helps create that light, crunchy texture chin-chin is known for.
Step 4: Bring the dough together
Gradually pour the egg and milk mixture into the bowl. Mix until everything starts coming together to form a dough. At this stage, don’t worry if it looks a bit rough, it will come together as you work with it.
Step 5: Adjust the dough consistency
If the dough feels too stiff or dry, add a little milk or water, one tablespoon at a time, until it becomes soft and pliable. If it’s too sticky, sprinkle in a bit of flour until it’s easy to handle. The goal is a smooth dough that doesn’t stick to your hands.
Step 6: Knead and roll out
Transfer the dough to a lightly floured surface and knead gently until smooth. Roll it out evenly to about ¼-inch thickness. Rolling the dough evenly helps the chin-chin fry uniformly without some pieces burning while others remain undercooked.
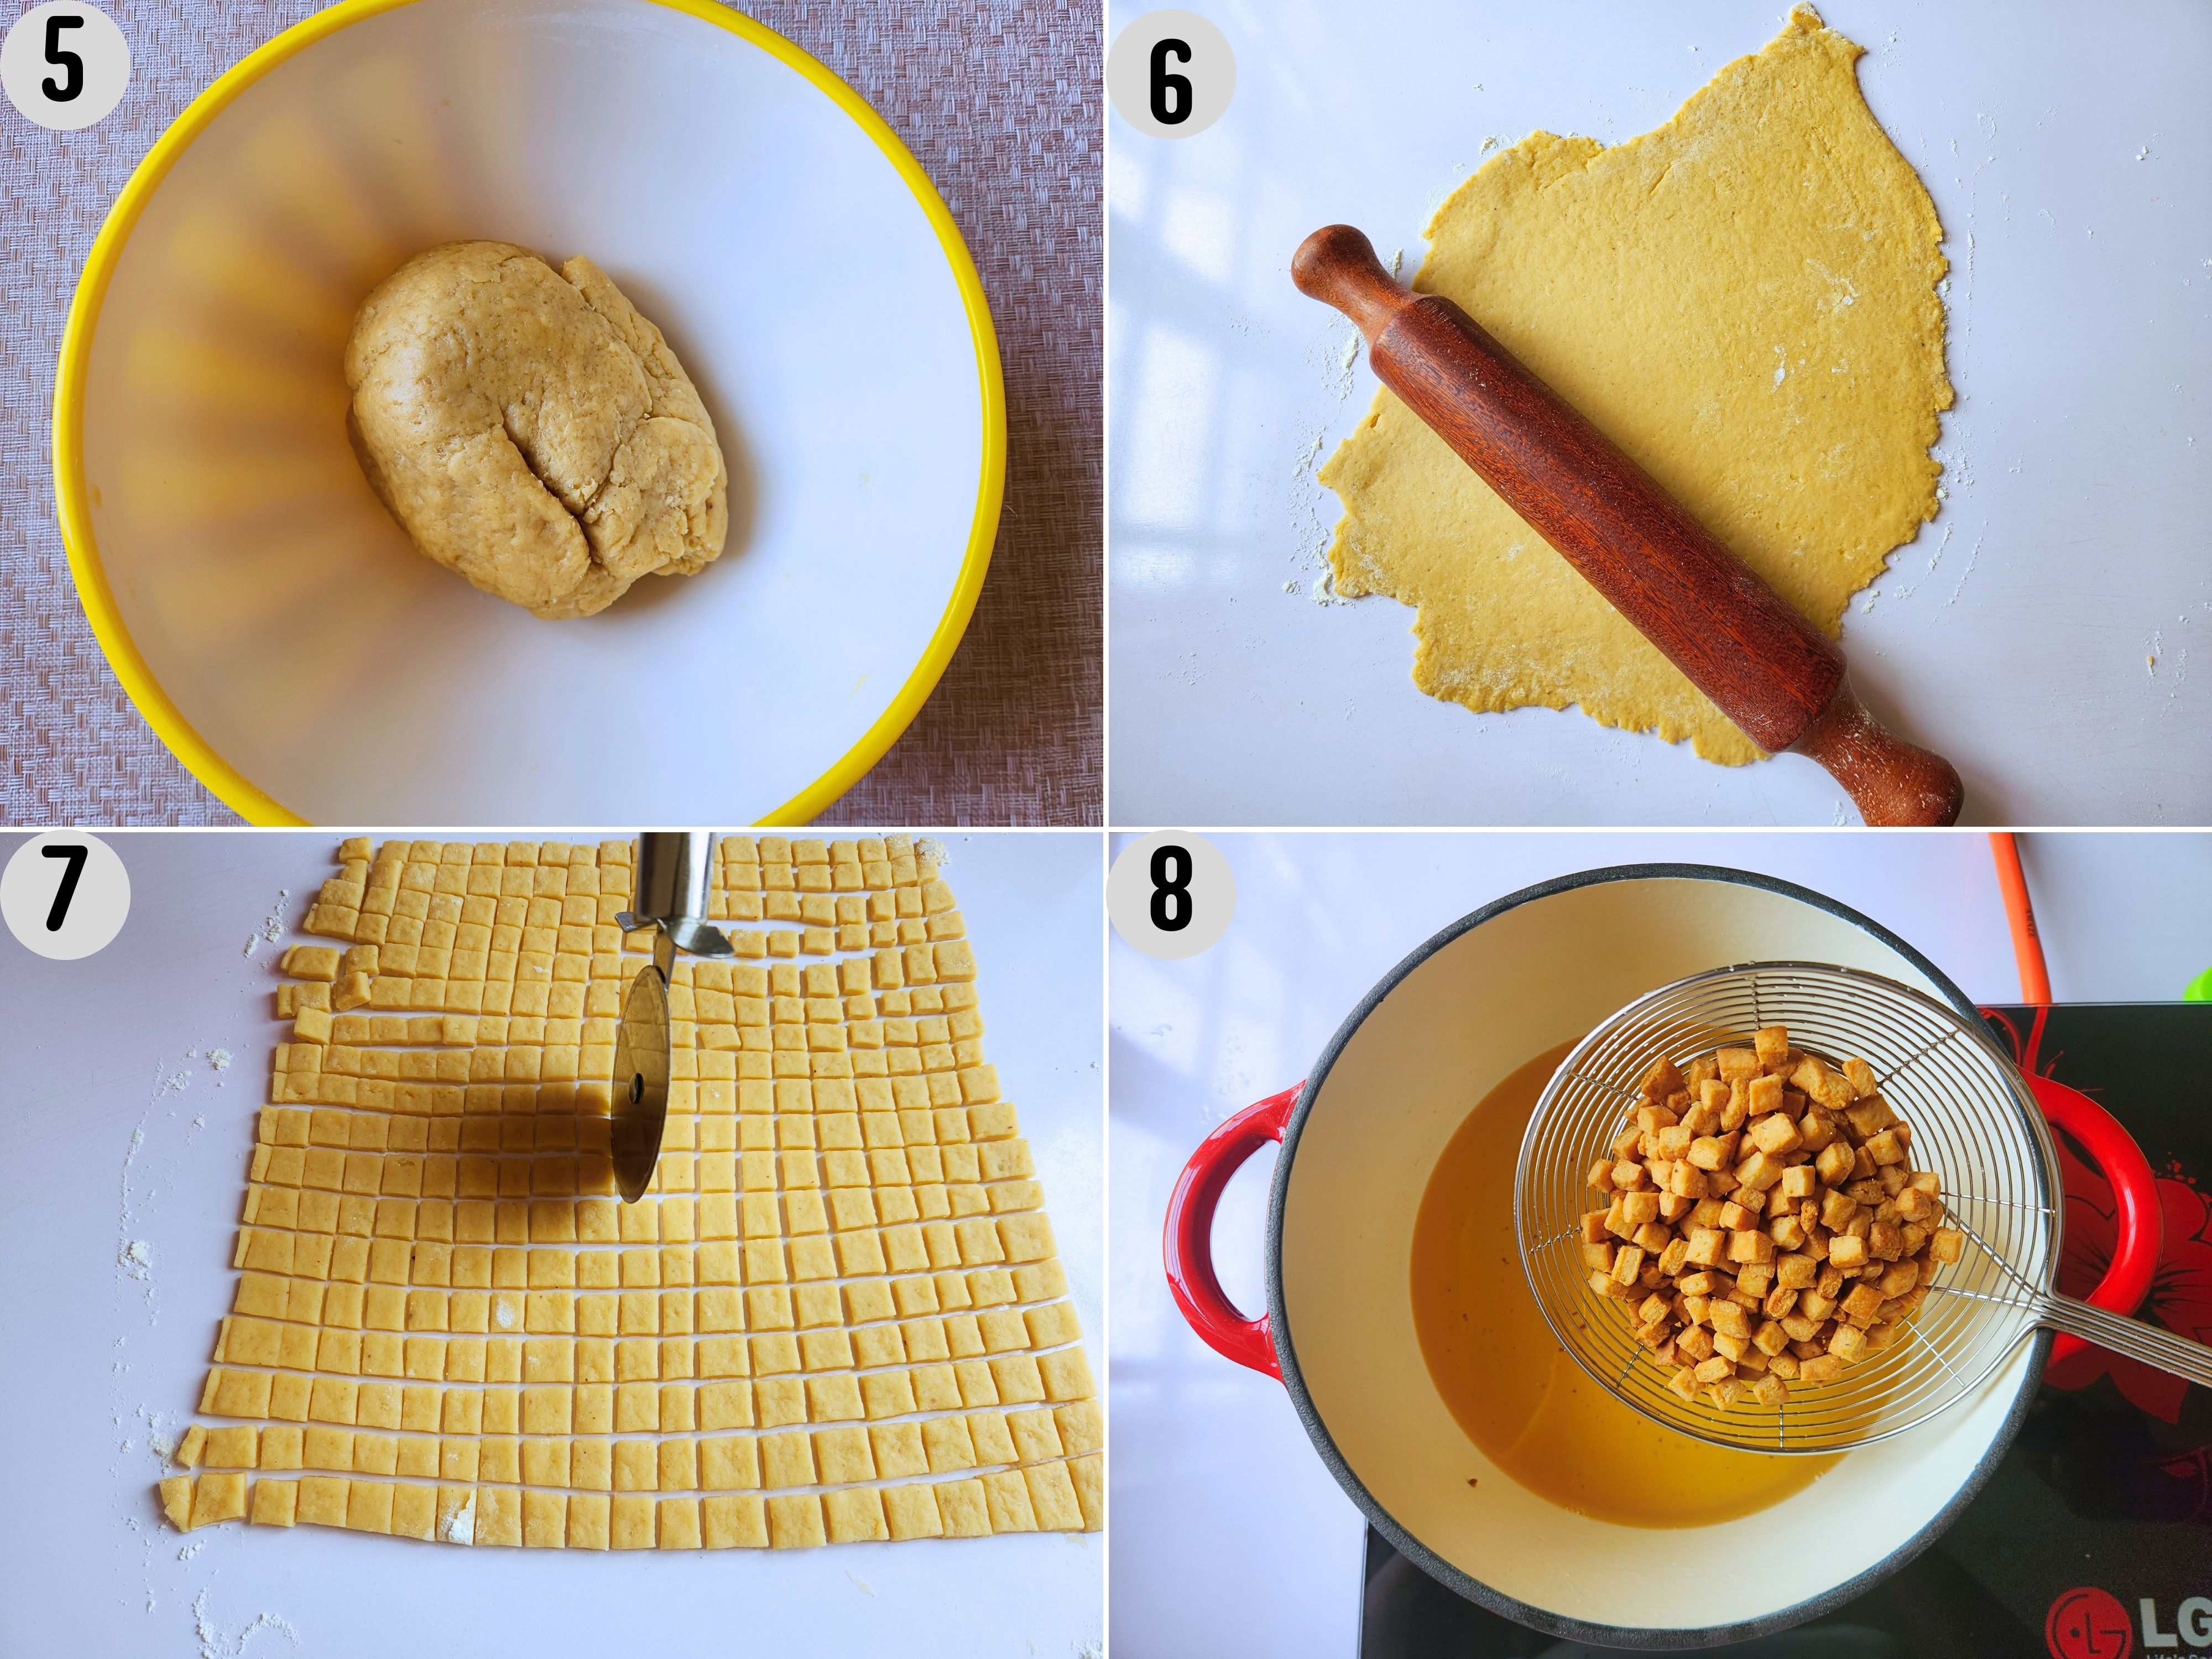
Step 7: Shape your dough
Using a sharp knife or pizza cutter, cut the dough into small squares, rectangles, or any shape you prefer. Lightly dust the pieces with flour to keep them from sticking together while you prepare to fry.
Step 8: Fry to golden perfection
Heat oil in a deep pan over medium heat. To check if the oil is ready, drop in a small piece of dough. If it begins to sizzle gently without browning too fast, the oil is perfect. Fry the chin-chin in small batches, stirring occasionally, until they turn a beautiful golden brown. Avoid overcrowding the pan so they fry evenly and stay crisp.
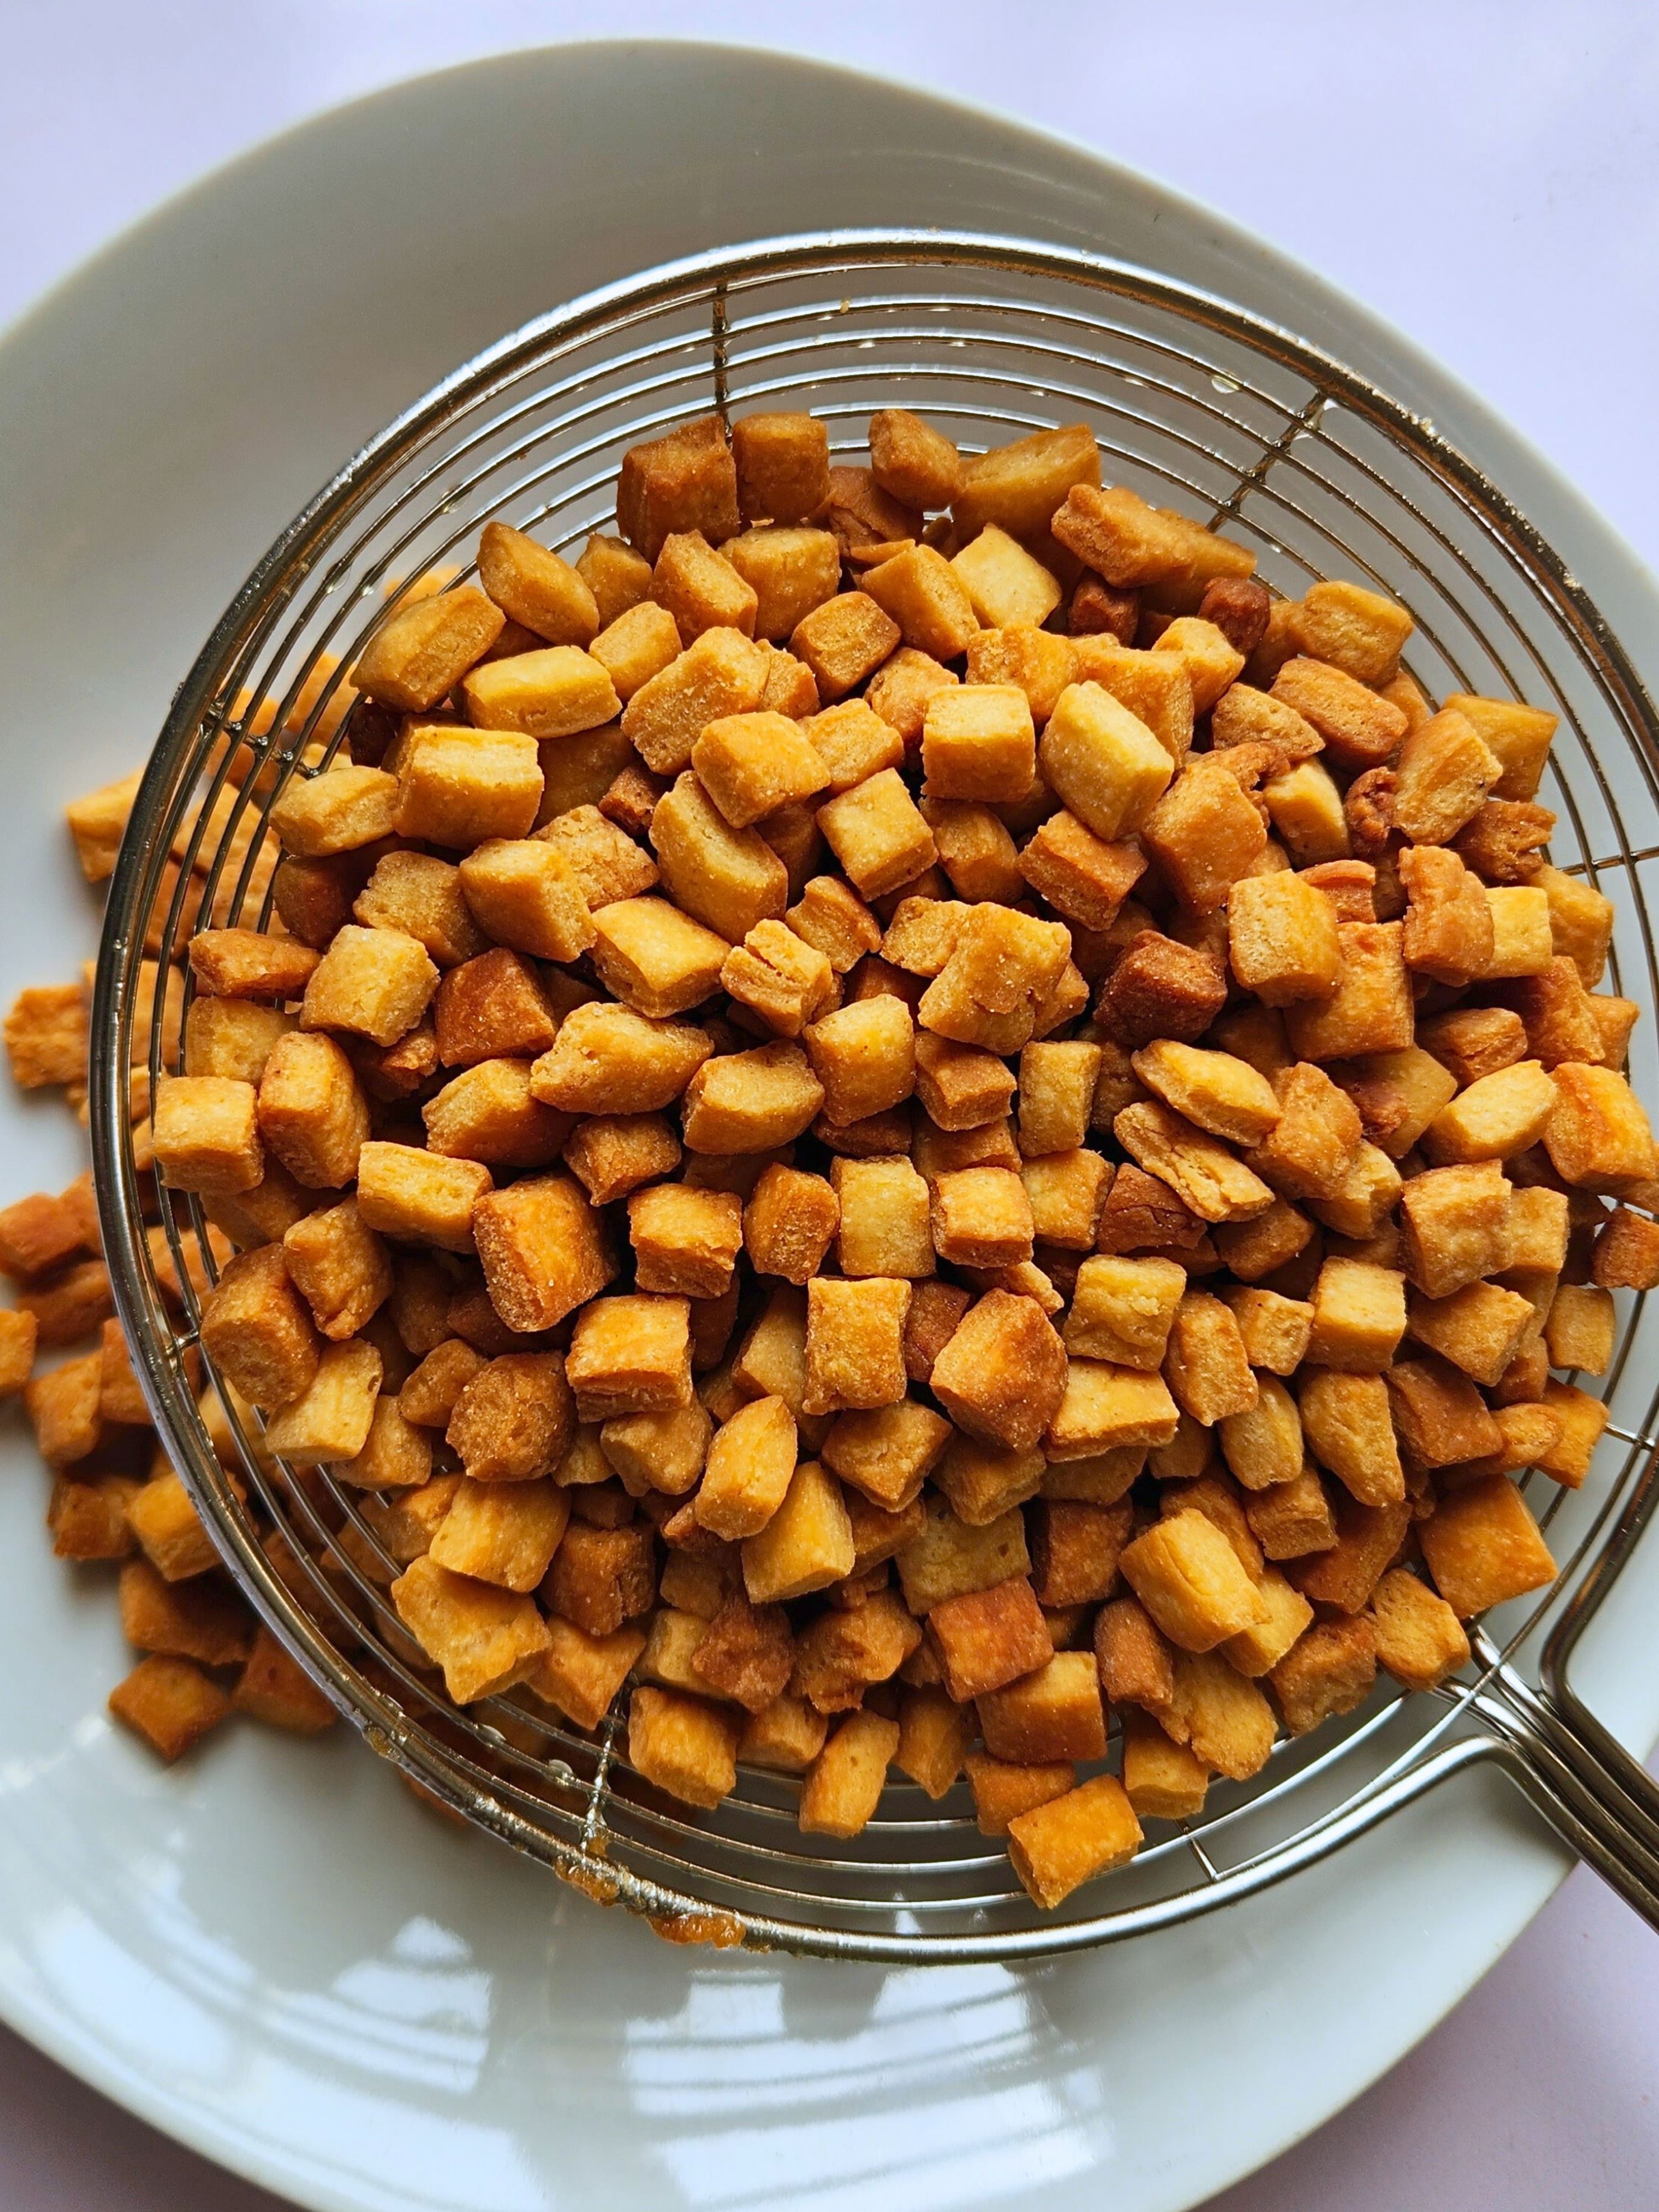
Step 9: Drain, cool, and enjoy
Remove the fried chin-chin with a slotted spoon and allow excess oil to drain. Place them on paper towels or in a sieve to absorb any remaining oil. Let the chin-chin cool completely before serving. This step is key, as cooling helps them firm up and become extra crunchy. Once cooled, store in an airtight container and enjoy your homemade crispy chin-chin anytime.
You may want to pair it with: Zobo drink
Helpful Tips for Perfect Chin-Chin Every Time
If you want your chin-chin to come out crunchy, flavorful, and just right, these simple tips will make a big difference. They’re the little details I pay attention to whenever I make chin-chin at home.
Take your time with mixing
Before adding any wet ingredients, make sure all your dry ingredients are thoroughly combined. This helps distribute the sugar, salt, and spices evenly. When you add the butter, work it properly into the flour until the mixture looks like coarse crumbs. This step is key to achieving that light, crispy texture.
Handle the dough gently
Once the dough starts coming together, stop mixing. Overworking the dough can activate the gluten too much, resulting in chin-chin that’s hard and tough instead of crunchy and light.
Prepare your surface before rolling
Lightly flour your work surface before rolling out the dough. This prevents sticking and makes it much easier to lift and separate the cut pieces without stretching or tearing them.
Roll the dough evenly
Try to roll the dough to a consistent thickness – about ¼ inch is ideal. Even thickness ensures that all the pieces fry at the same rate, giving you chin-chin with uniform color and crunch.
You’ll also enjoy: Meat pie recipe
Pay attention to the oil temperature
Always fry chin-chin over medium heat. If the oil is too hot, the outside will brown quickly while the inside remains undercooked. A quick test with a small piece of dough will help you know when the oil is just right.
Fry in small portions
Avoid crowding the pot when frying. Frying in batches helps maintain the oil temperature and allows each piece enough space to cook evenly and become perfectly crispy.
Use the right cutting tools
For neat, even shapes, a pizza cutter or pastry wheel works faster and more efficiently than a knife. They also help you achieve uniform sizes, which leads to even frying.
Choose a deep pot for safety
As chin-chin fries, the oil can begin to foam, especially after multiple batches. Using a deep pot with oil filled only halfway reduces the risk of spills and makes frying much safer.
Let the chin-chin cool completely
Once fried, allow the chin-chin to cool fully on paper towels or a wide metal sieve. This cooling period helps lock in the crunch. Once cooled, store in an airtight container to keep it fresh for days.
Adjust the flavor to your liking
Feel free to customize your chin-chin. You can tweak the amount of nutmeg, add a splash of vanilla, or adjust the sweetness to suit your taste. That’s the beauty of making it at home, no restrictions to please your taste buds.
How to Store Chin-Chin & How Long It Lasts
One of the reasons chin-chin is such a beloved snack is how well it stores when handled properly. With the right storage method, you can enjoy its crunch for weeks without any loss of flavor.
Allow it to cool completely
After frying, chin-chin must be allowed to cool fully before storing. Packing it while still warm traps heat and steam, which leads to condensation. This moisture is what causes chin-chin to turn soft or soggy over time, so patience at this stage really pays off.
Use airtight storage
Once cooled, store your chin-chin in an airtight container, glass jar, or tightly sealed zip-lock bag. Airtight storage keeps moisture and air out, helping the chin-chin maintain its crunch for much longer. To go the extra mile, you can place a paper towel at the bottom of the container to absorb any excess moisture.
Choose the right storage location
Keep your container in a cool, dry place away from heat, humidity, or direct sunlight. Heat can cause the chin-chin to lose its crispness, while moisture shortens its shelf life.
Avoid frequent opening
Try not to open the container too often. Constant exposure to air makes chin-chin stale faster and reduces its crunch over time.
Do not refrigerate
Refrigerating chin-chin is not recommended. The fridge introduces moisture, which causes the snack to lose its texture and go stale more quickly.
How Long Chin-Chin Lasts
- At room temperature: When stored properly in an airtight container, chin-chin can last 2–3 weeks while staying crunchy.
- For extended storage: If fully dried and tightly sealed, chin-chin can last up to one month.
Freezing for long-term storage
If you want to store chin-chin for an even longer period, freezing is a great option. Place it in a sealed freezer bag or airtight container and freeze. When ready to eat, allow it to thaw at room temperature. To refresh the crunch, you can briefly air-fry or bake it for 2–3 minutes.
Vacuum sealing (optional but effective)
For maximum freshness, especially if you plan to send chin-chin to friends or family far away, a vacuum sealer works wonders. It removes air completely, helping the chin-chin stay fresh and crunchy for a very long time.
Chin-chin
- Total Time: 35 minutes
- Yield: 8 to 10 servings 1x
- Diet: Vegetarian
Description
Crispy, golden-brown fried snack made from sweet dough. It is perfect for tea time, parties, or a crunchy treat anytime.
Ingredients
-
3 cups all-purpose flour
-
1/2 cup granulated sugar
-
1/2 cup unsalted butter, softened (or margarine)
-
1 large egg
-
1/2 cup evaporated milk (or whole milk)
-
1 teaspoon baking powder
-
1/2 teaspoon ground nutmeg
-
1/4 teaspoon salt
-
Vegetable oil, for frying
Instructions
-
In a small bowl, whisk together the egg and milk. Set aside.
-
In a large bowl, combine flour, sugar, salt, nutmeg, and baking powder.
-
Add butter and rub into the flour mixture until crumbly.
-
Gradually mix in the egg and milk mixture to form a dough.
-
If dough is too dry, add 1 tablespoon milk or water at a time until soft but not sticky.
-
Transfer dough to a lightly floured surface, knead briefly, and roll out to about ¼-inch thickness.
-
Cut dough into small squares or strips and dust lightly with flour.
-
Heat oil over medium heat and fry chin chin in batches until golden brown, stirring occasionally.
-
Remove with a slotted spoon and drain on paper towels.
-
Allow to cool completely before serving or storing.
Notes
For extra crunch, roll the dough thinner and fry on medium-low heat so it cooks evenly inside.
Nutmeg can be replaced with cinnamon or vanilla for a different flavor twist.
Do not overcrowd the oil — fry in batches to prevent soggy chin chin.
Let chin chin cool completely before storing to keep it crisp.
Store in an airtight container at room temperature for up to 2 weeks.You can bake chin chin at 350°F (180°C) for 18–22 minutes, flipping halfway, for a lighter version.
- Prep Time: 20 minutes
- Cook Time: 15 minutes
- Category: Snack/dessert
- Method: Frying
- Cuisine: Nigerian