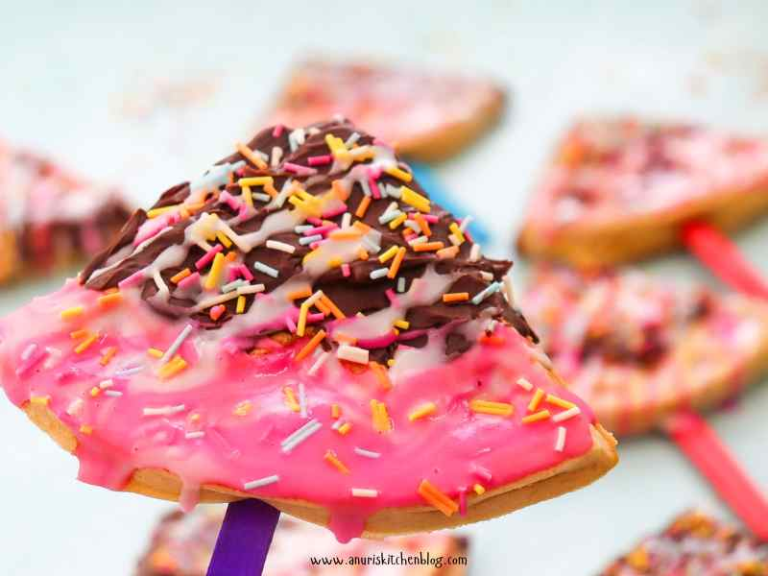
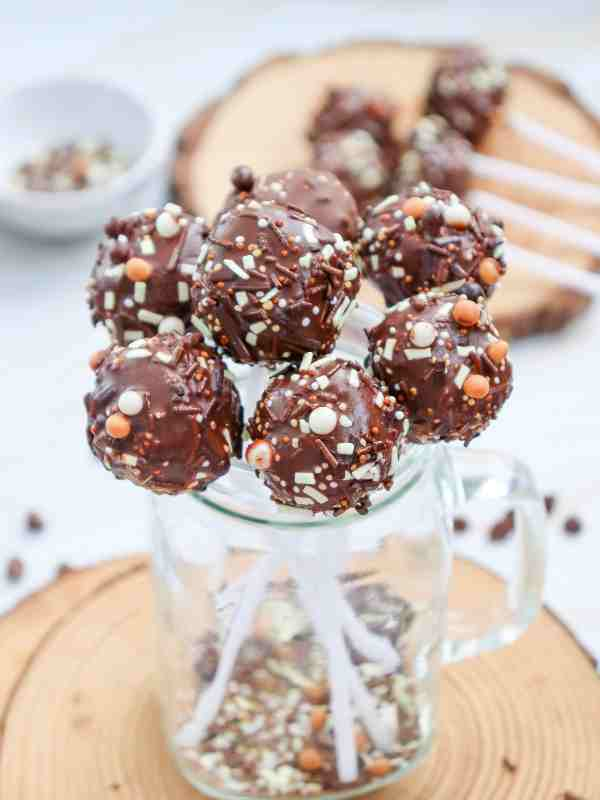
A+ Pop Cakes
Most people don’t realize how much precision goes into creating a pop cake. It’s not just cake on a stick, every element matters.
The size of the cake ball affects the bite, making sure it’s not too dense or too crumbly.
The ratio of cake to frosting impacts both flavor and texture, too much frosting can be overly sweet, too little and the cake may feel dry.
Even the stick placement is important, it is centered perfectly to prevent tilting or breaking when dipped.
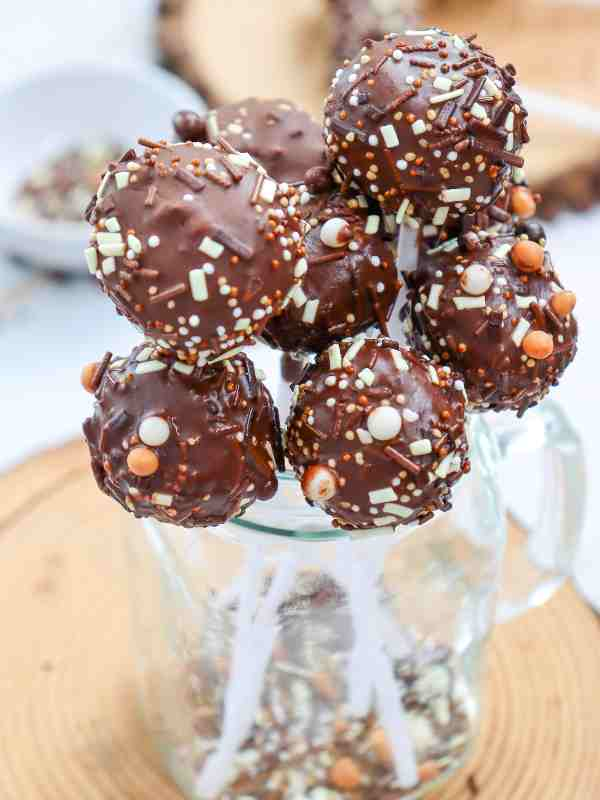
Beyond the technique, A+ Pop Cakes come off in a way people enjoy them. Their small size makes them easy to hold, and their colorful, playful appearance naturally draws attention.
At parties or casual gatherings, they give people something to share and talk about.
A simple bite of cake and frosting on a stick may seem small, but it creates a little moment of enjoyment that can bring a smile to anyone who tries it.
History / Background
Pop cakes, also known as cake pops, trace their origins to the early 2000s when creative bakers began experimenting with bite-sized desserts that were both portable and visually appealing.
While the exact inventor is debated, the concept gained mainstream popularity thanks to bakeries and food bloggers who showcased these playful treats online.
The idea was simple but innovative: take crumbled cake, mix it with frosting to bind, shape it into small balls, and coat it in chocolate or candy melts.
The addition of a stick transformed the cake into a handheld dessert, making it perfect for parties, events, or casual snacking.
Over time, bakers refined the technique, paying closer attention to balance, coating, and decoration, which is how A+ Pop Cakes, perfectly portioned, beautifully finished, and consistently enjoyable, came to be recognized as a go-to treat for celebrations of all kinds.
Ingredients
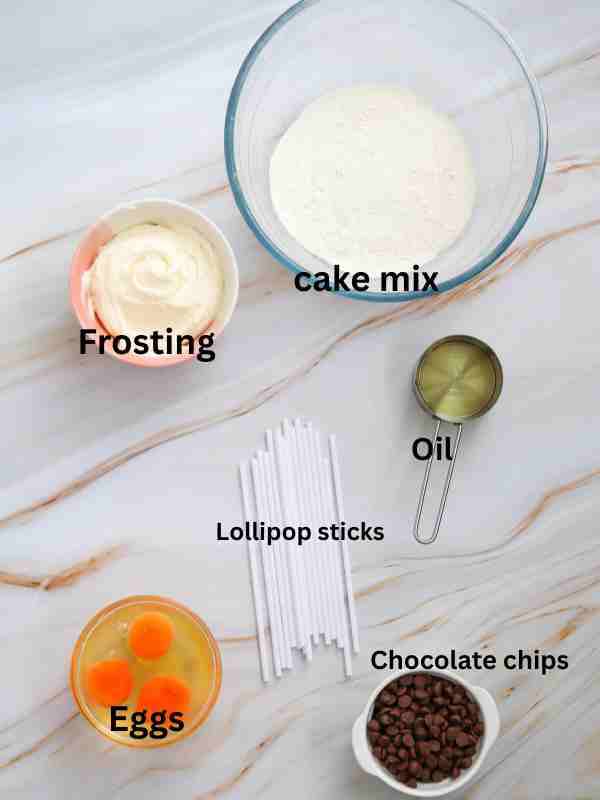
- 1 box of cake mix (any flavor): Provides the base for your pop cakes. You can choose classic flavors like chocolate or vanilla, or get creative with fun flavors like red velvet or lemon.
- Ingredients called for on the cake mix box (usually eggs, water, and oil): These are essential to bake the cake according to the mix instructions. Following the measurements ensures the cake has the right texture for shaping into pops.
- 1/2 cup of frosting (any flavor, such as Betty Crocker): Acts as a binder when mixed with crumbled cake, creating a consistency that holds together well for shaping into balls.
- 1 cup of chocolate chips, melting chocolate, or candy melts: Used to coat the pop cakes, giving them a smooth, sweet finish and making them visually appealing.
- Sprinkles (for decoration): Optional, but perfect for adding color, texture, and a festive touch to your pop cakes.
- Lollipop sticks: Essential for making the cake portable and easy to hold. Proper placement ensures the pop stays intact while dipping and decorating.
- Styrofoam block or cake pop stand: Used to hold the pops upright while the coating sets, ensuring they dry evenly and maintain their shape.
Instructions
-
Bake the Cake

- Preheat your oven according to the cake mix package instructions.
- Prepare the cake mix as directed on the package.
- Pour the batter into a greased baking pan and bake for the time specified on the box (typically 25-30 minutes).
- Once baked, let the cake cool completely.
-
Crumb the Cake
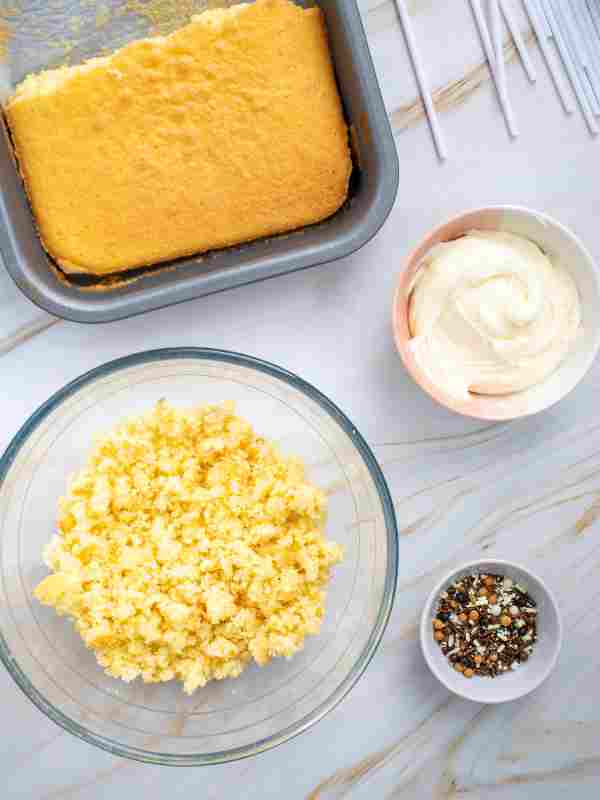
- Crumble the cooled cake into a large bowl until it resembles fine crumbs.
-
Mix with Frosting
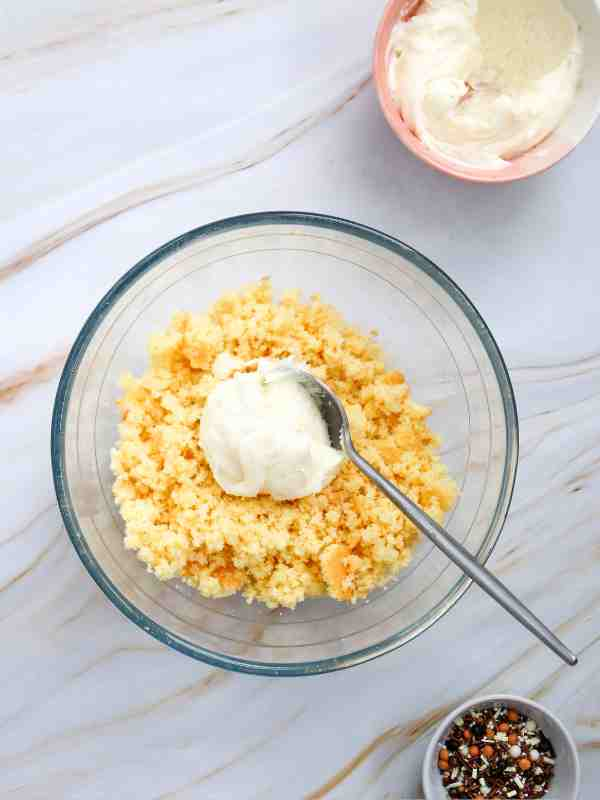
- Add about ½ cup of Betty Crocker frosting to the crumbled cake. Mix well until the mixture is moist and holds together when rolled into a ball.
- You may need more frosting depending on the cake flavor and moisture, add gradually until it’s just right.
-
Form Cake Balls
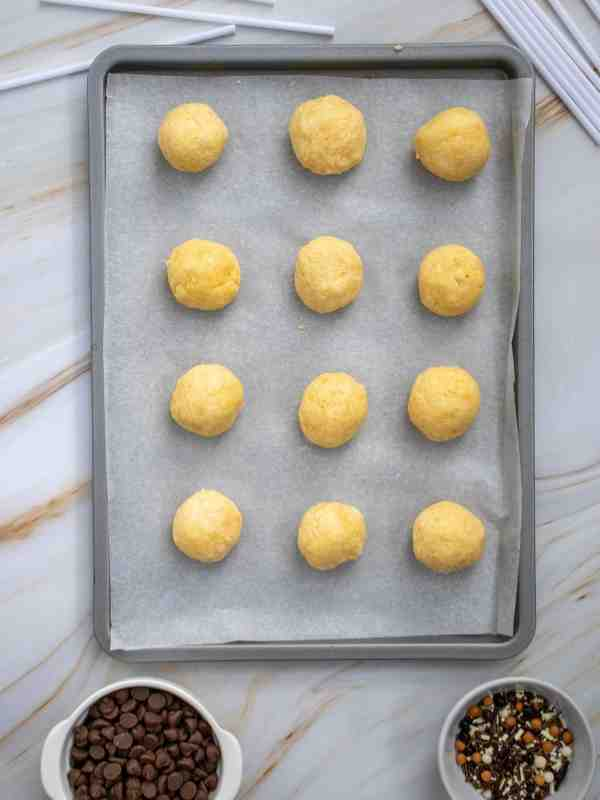
- Scoop out about 1 tablespoon of the cake mixture and roll it into a ball. Place the cake balls on a baking sheet lined with parchment paper. Repeat until all the mixture is rolled into balls.
-
Chill the Cake Balls
- Refrigerate the cake balls for about 30 minutes to an hour to firm them up, making it easier to dip them in chocolate.
-
Melt the Chocolate

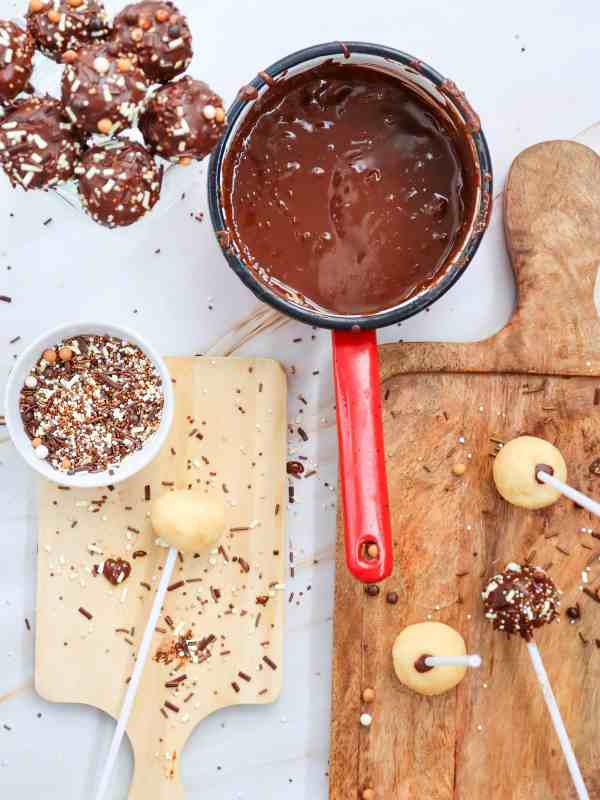
- While the cake balls chill, melt the chocolate chips in a microwave-safe bowl. Heat in 30-second intervals, stirring in between, until smooth and fully melted.
-
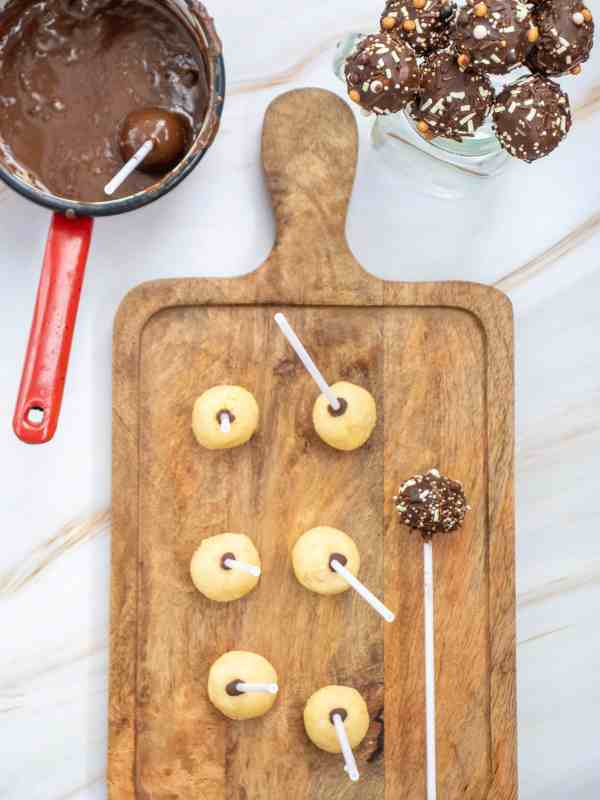
Dip the Cake Pops
- Take a lollipop stick and dip one end into the melted chocolate before inserting it into a cake ball (to help the stick stay in place). Insert the stick halfway into the ball.
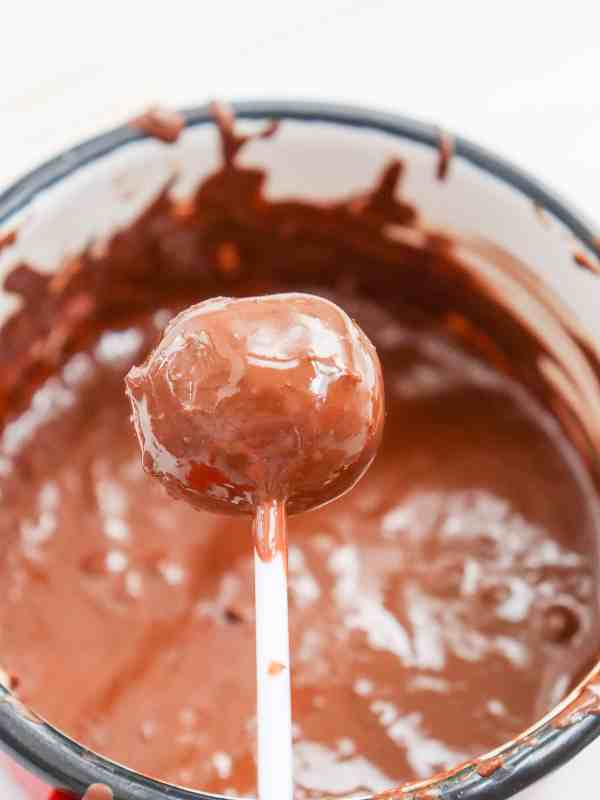
- Dip the cake ball into the melted chocolate, ensuring it’s fully coated. Tap off any excess chocolate.
-
Add Sprinkles
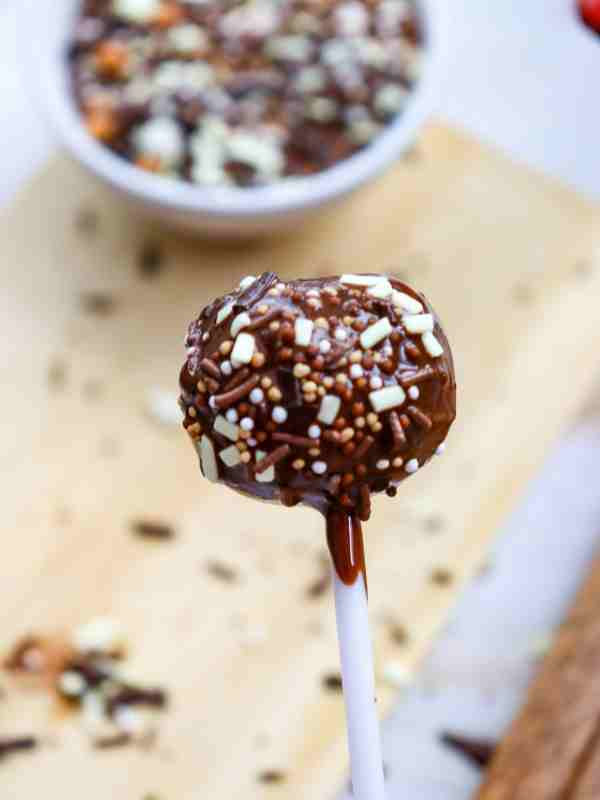
- Before the chocolate hardens, immediately roll the coated cake pop in sprinkles or sprinkle them on top.
-
Dry the Cake Pops (approximately 30 minutes)
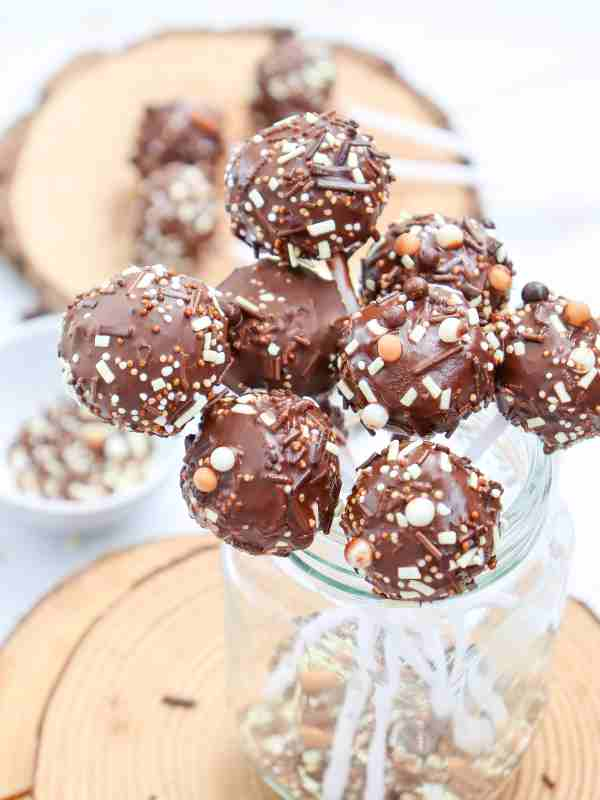
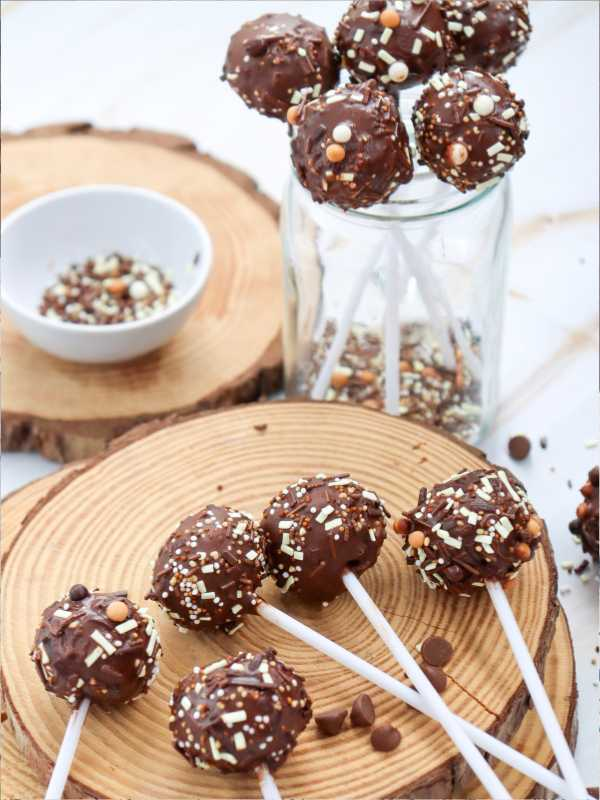
- Place the finished cake pops upright in a styrofoam block or cake pop stand to dry. Let them sit until the chocolate is completely set.
-
Enjoy
- Your cake pops are ready to be enjoyed!.
Essential Tips for Perfect Pop Cakes

- Cool the Cake Completely: Warm cake will make it hard to shape and hold together. Always crumble fully cooled cake.
- Balance Cake and Frosting: Too much frosting makes the mixture too soft, too little and the pops crumble. Aim for a firm but pliable texture.
- Chill the Cake Balls: Refrigerate or freeze the shaped balls for 15–30 minutes before dipping. This prevents cracking and slipping of the coating.
- Proper Stick Placement: Center the lollipop stick carefully. For extra stability, dip the stick in melted chocolate before inserting.
- Thin the Coating if Needed: Add a little shortening or vegetable oil to thick chocolate or candy melts for smooth, even coverage.
- Decorate While Wet: Apply sprinkles or toppings while the coating is still soft to ensure they stick well.
- Use a Stand: Styrofoam or a cake pop stand keeps pops upright while drying, preventing smudges or uneven surfaces.
Health & Dietary Options
While pop cakes are usually enjoyed as a sweet treat, there are ways to adapt them for different dietary needs or preferences without compromising taste or fun:
- Gluten-Free: Use a gluten-free cake mix and check that your frosting and candy melts are also gluten-free. This makes the pop cakes safe for those with gluten sensitivities.
- Vegan: Opt for a plant-based cake mix or homemade vegan cake, use dairy-free frosting, and replace chocolate or candy melts with vegan alternatives.
- Lower Sugar: Choose reduced-sugar cake mixes or frostings, or swap the coating for a lightly sweetened yogurt or chocolate drizzle.
- Nut-Free: Ensure all ingredients, especially chocolate and candy melts, are free from nuts to make the pops safe for children or guests with allergies.
- Portion Control: Pop cakes are already single-serve, which helps control portion size, making them easier to enjoy without overindulging.
- Creative Additions: For a slightly healthier twist, you can mix in finely chopped fruit or seeds into the cake-frosting mixture, keeping it playful while adding a nutritional boost.
Serving & Storage
Serving:
- Pop cakes are best served at room temperature or slightly chilled, depending on preference.
- Arrange them upright on a Styrofoam block, cake pop stand, or decorative platter for an appealing presentation.
- They’re perfect for parties, gatherings, or as individual treats, making them easy for guests to pick up and enjoy.
Storage:
- Short-term: Store in an airtight container at room temperature for 1–2 days.
- Refrigeration: If your pops contain perishable frosting or chocolate, keep them in the fridge for up to 5 days. Let them come to room temperature before serving for best flavor.
- Freezing: Pop cakes can be frozen for up to a month. Wrap each individually in plastic wrap and place in an airtight container. Thaw at room temperature before serving.